Classic Peanut Butter Cookies
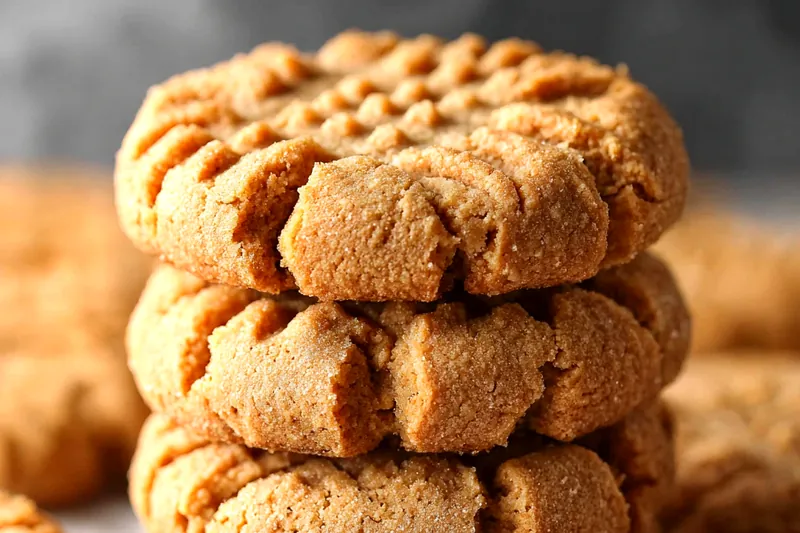
Soft and chewy peanut butter cookies with the perfect balance of sweet and salty. Easy recipe with classic crosshatch design that's ready in 30 minutes.

The Secret to Perfect Peanut Butter Cookies
The key to exceptional peanut butter cookies lies in achieving the perfect balance of textures and flavors. Using both granulated and brown sugar creates cookies that are tender yet have structure, while the combination of creamy peanut butter and butter provides richness without being too dense.
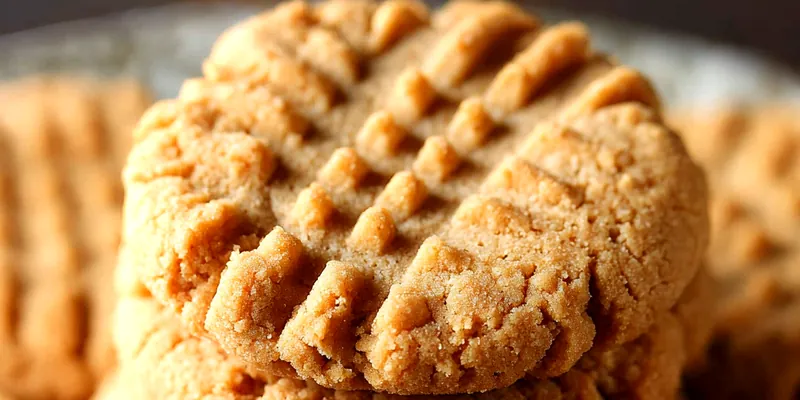
The classic crosshatch pattern isn't just decorative - it serves a functional purpose by helping the cookies bake evenly and creating the signature texture that makes peanut butter cookies so recognizable. The gentle pressing also ensures the cookies don't puff up too much during baking.
💡 Professional Tip
Don't overbake these cookies! They should look slightly underdone in the center when you remove them from the oven. They'll continue cooking on the hot pan and finish with the perfect chewy texture.
Frequently Asked Questions
Yes! Crunchy peanut butter will give you cookies with extra texture. The baking time and technique remain the same, but you'll get delightful peanut pieces throughout.
Make sure your butter isn't too warm and that you're measuring flour correctly. Chilling the dough for 30 minutes before baking can also help prevent excessive spreading.
Absolutely! The dough can be refrigerated for up to 3 days or frozen for up to 3 months. If frozen, thaw in the refrigerator before shaping and baking.
Store in an airtight container at room temperature for up to 1 week. For longer storage, freeze baked cookies for up to 3 months.
Yes! For smaller cookies, use 1 tablespoon of dough and bake for 8-10 minutes. For larger cookies, use 3 tablespoons and bake for 12-14 minutes.
You can substitute with an equal amount of granulated sugar, though the cookies will be slightly less chewy and won't have the molasses flavor that brown sugar provides.
Not as written, but you can substitute the all-purpose flour with a 1:1 gluten-free flour blend. The texture may be slightly different but still delicious.
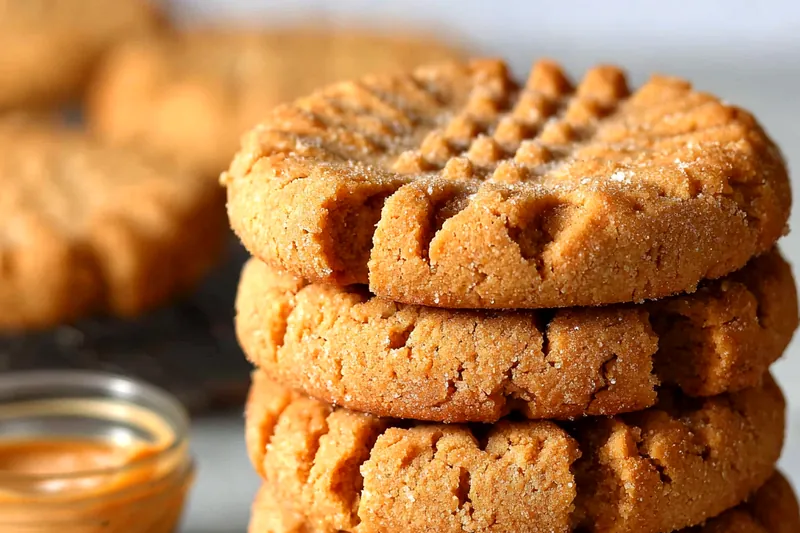
Rolling in sugar creates a sweet, slightly crispy exterior while keeping the interior soft. It also helps achieve the classic sparkly appearance of peanut butter cookies.
Recipe Troubleshooting Guide
Cookies Too Hard
Problem: Cookies turn out hard and crunchy instead of soft
Solution: Don't overbake - remove when edges are set but centers look slightly underdone. Store with a slice of bread to soften if needed.
Cookies Spread Too Thin
Problem: Cookies spread out too much and become flat
Solution: Chill the dough for 30 minutes, ensure butter isn't too warm, and check that you're using enough flour. Don't skip the crosshatch pressing.
Dry or Crumbly Texture
Problem: Cookies are dry and fall apart
Prevention: Don't overmix the dough once flour is added. Ensure peanut butter and butter are properly creamed together before adding dry ingredients.
Uneven Baking
Problem: Some cookies are done while others need more time
Recovery: Make sure all cookie balls are the same size, space them evenly on the pan, and rotate the baking sheet halfway through baking.
Bland Flavor
Problem: Cookies lack peanut butter flavor
Prevention: Use high-quality peanut butter with good flavor. Natural peanut butters often have more intense taste than processed varieties.
Flavor Balance Issues
Too Sweet: Add a pinch more salt or use salted peanut butter next time
Too Salty: Reduce salt in the recipe or serve with milk to balance
Bland: Increase vanilla extract or use natural peanut butter for more intense flavor
Choosing the Right Ingredients
The type of peanut butter you choose significantly impacts your cookies' flavor and texture. Creamy, well-stirred peanut butter works best for consistent results. Natural peanut butters can be used but may require slight adjustments to the flour amount depending on oil content.
Using both granulated and brown sugar is crucial for the perfect texture. Granulated sugar creates crispy edges and helps with spreading, while brown sugar adds moisture and chewiness. The combination gives you the best of both worlds in every bite.
Essential Ingredient Notes
- Peanut Butter Selection: Choose a creamy peanut butter that doesn't separate easily. Popular brands like Jif or Skippy work perfectly, but natural varieties can be used if well-stirred.
- Butter Temperature: Butter should be softened but not melted. It should give slightly when pressed but still hold its shape. This ensures proper creaming with the sugars.
- Fresh Baking Soda: Make sure your baking soda is fresh (less than 6 months old) for proper rise and texture. Old baking soda can result in flat, dense cookies.
Mastering the Technique
Proper creaming of the peanut butter, butter, and sugars is essential for light, tender cookies. This process incorporates air into the mixture, creating the foundation for the perfect texture. Don't rush this step - it should take 3-4 minutes of mixing.
The crosshatch pattern serves multiple purposes beyond decoration. It helps the cookies bake evenly, prevents excessive puffing, and creates the classic peanut butter cookie appearance. Press gently but firmly to create clear lines without completely flattening the cookies.
The Perfect Press
When making the crosshatch pattern, press the fork about halfway through the cookie. The dough should spread slightly but not flatten completely. This creates the ideal thickness for even baking.
Classic Peanut Butter Cookies
📋 Ingredients
For the Cookie Dough
- 2-3 tbsp granulated sugarFor rolling the cookie balls
- 1/4 tsp flaky sea saltOptional finishing touch
For Finishing
- 240g creamy peanut butterUse well-stirred, room temperature
- 113g unsalted butter, softenedShould be pliable but not melted
- 100g granulated sugarCreates crispy edges
- 100g brown sugar, packedAdds moisture and chewiness
- 1 large eggBinds ingredients together
- 1 tsp vanilla extractEnhances overall flavor
- 190g all-purpose flourProvides structure
- 1 tsp baking sodaCreates tender texture
- 1/2 tsp saltBalances sweetness
Instructions
Prepare for Baking
Preheat oven to 350°F (175°C). Line two baking sheets with parchment paper. Set aside a small bowl with 2-3 tablespoons granulated sugar for rolling.
Cream Wet Ingredients
In a large bowl, cream together peanut butter, softened butter, granulated sugar, and brown sugar until light and fluffy, about 3-4 minutes. Beat in egg and vanilla extract until well combined.
Mix Dry Ingredients
In a separate bowl, whisk together flour, baking soda, and salt. Gradually mix the dry ingredients into the wet ingredients until just combined. Don't overmix.
Shape the Cookies
Roll dough into 1.5-inch balls (about 2 tablespoons each). Roll each ball in granulated sugar and place on prepared baking sheets, spacing them 2 inches apart.
Create Crosshatch Pattern
Using a fork, gently press down on each cookie to create a crosshatch pattern, flattening slightly. The cookies should be about 1/2 inch thick after pressing.
Bake and Cool
Bake for 10-12 minutes until edges are set but centers still look slightly underbaked. Sprinkle with flaky sea salt if desired. Cool on baking sheet for 5 minutes before transferring to a wire rack.
Recipe Notes & Tips
Storage
Store cooled cookies in an airtight container at room temperature for up to 1 week. For longer storage, freeze baked cookies for up to 3 months in freezer-safe containers.
Make-Ahead Tips
Cookie dough can be prepared and refrigerated for up to 3 days or frozen for up to 3 months. Shape into balls before freezing for easy baking later.
Variations
Try adding mini chocolate chips, chopped peanuts, or a drizzle of melted chocolate after cooling. For extra richness, use half crunchy peanut butter for texture variation.